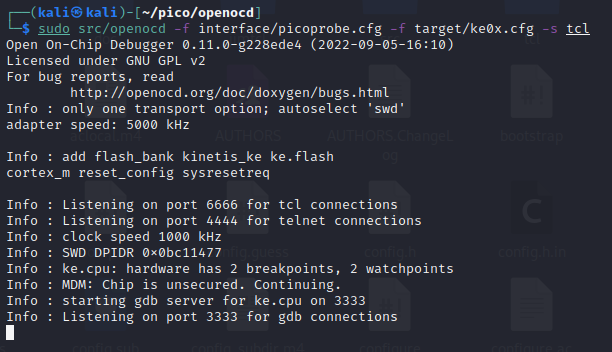
Recapping from last time; with the Pi Pico flashed with the picoprobe SWD probe firmware all that’s needed is to power everything up and run the following to connect to the target.
openocd -f interface/picoprobe.cfg -f target/ke0x.cfg -s tcl
That should get you some output which looks a lot like the following
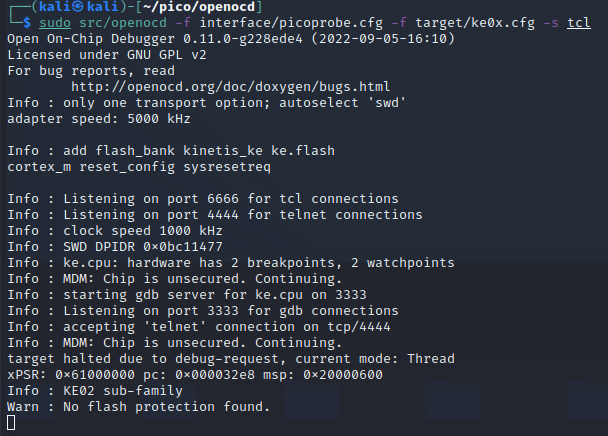
When you successfully connect with telenet and issue the following command to openOCD to halt the CPU core and hold it in reset.
reset init
Dumping the Firmware
Over in the telenet window which is connected to openOCD it time to see what flash is discoverable and try and read it out with the following.
flash banks
flash probe 0
flash read_bank 0 output.bin
You can skip right to the last command to try and read the firmware out but I was exploring when I first connected and ran the other two to see if the flash layout was what I expected from information in the datasheet of the microcontroller.

If all goes well then you should see output like in the above image from the telnet window and back over in the terminal where openOCD is running something along the lines of the following will be visible.
While everything is hooked up and appears to be working it’s a good plan to do several reads of the flash so they can be compared. If they all match then there’s a good chance you’ve read it out correctly, gotten a good dump, and there aren’t any odd protection mechanisms in play.
In my case I read out 3 binaries from the microcontroller and got the same 64 kB binary file 3 times which, given the microcontroller being used on has 64 kB of memory in a single bank, suggests they’re all good or all corrupted. For now, I’ll assume they’re all good and carry on!
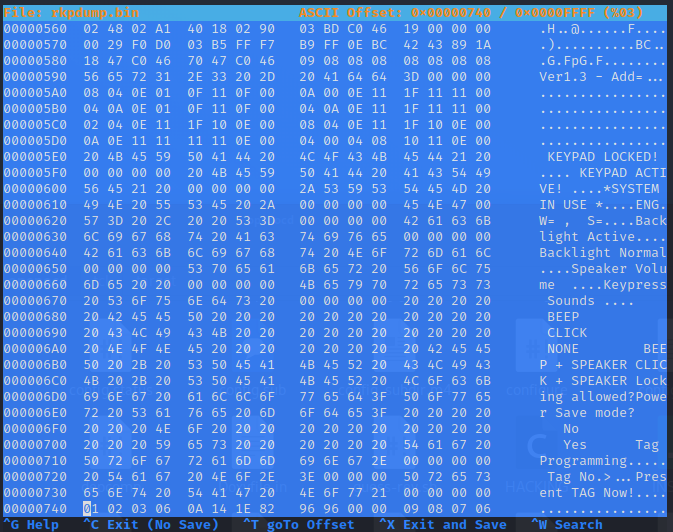
A good first to poking at simple firmware packages like you’ll get on this kind of product and for this kind of microcontroller is to run strings against it or, as shown above, open it in a hex editor and see what you can see.
With things like, “KEYPAD LOCKED!” hiding in there I think we’re on to a winner and we know one more thing too. This is the same firmware as runs on the more expensive remote keypads which have screen on them.
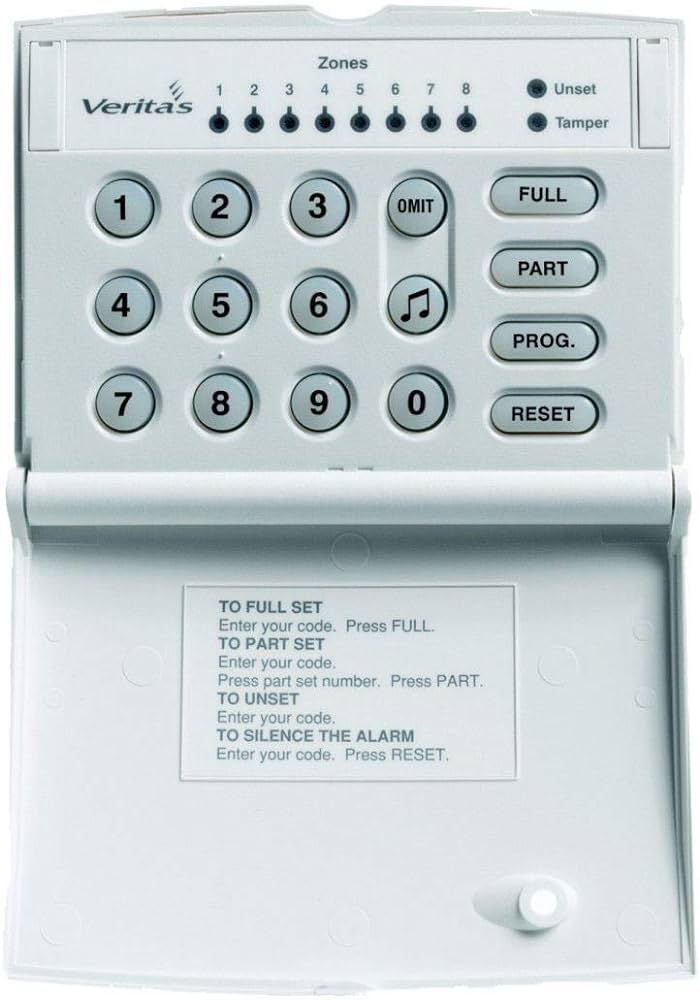
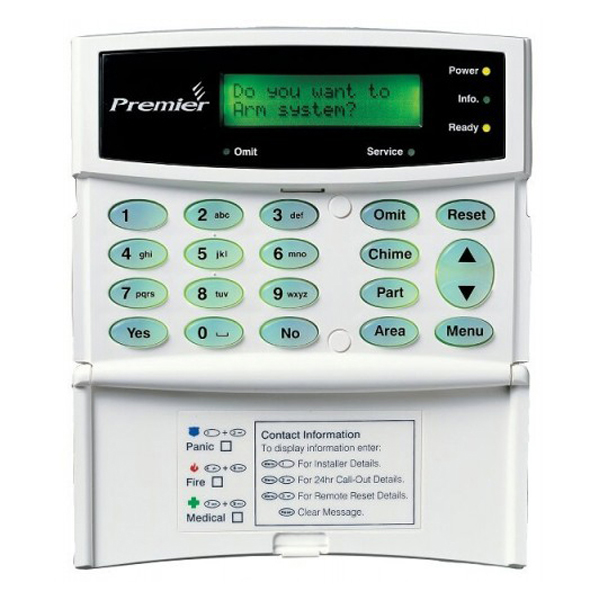
Above are the Texecom remote keypads which are probably the most applicable to this firmware. The one on the left is the one we have, the DCA-0001, and the one on the left is the keypad I believe the firmware also runs on, the DCB-0001.
This doesn’t impact anything for the time being but it’s all useful intel for things we may see later on in the disassembly.
Up Next
Disassembly of the binary we got and the Ghidra fun begins in Part 4!